Java 扫描微信公众号二维码,关注并自动登录网站
发表时间: 2018-07-19 10:39:34 | 浏览次数:
前几天小编写了一篇PHP的,那也写一篇Java的,逻辑都一样的。
场景:用户扫描微信公众号的二维码,关注后自动登录网站,若已关注则直接登录。
逻辑:
1.系统生成带参数(此参数自定义为唯一值)的临时二维码(微信公众平台有提供该接口,可查看一下开发文档);
2.用户使用微信扫描该二维码,关注后微信服务器会将数据(自定义参数、openid...)返回到我们的服务器;
3.我们服务器将接收到的openid再次向微信服务器发起请求,获取该用户的信息(昵称、头像、地域、unionid(若绑定了微信开放平台,则有此参数));
4.我们将返回的用户信息存储到数据库,用作于登录。
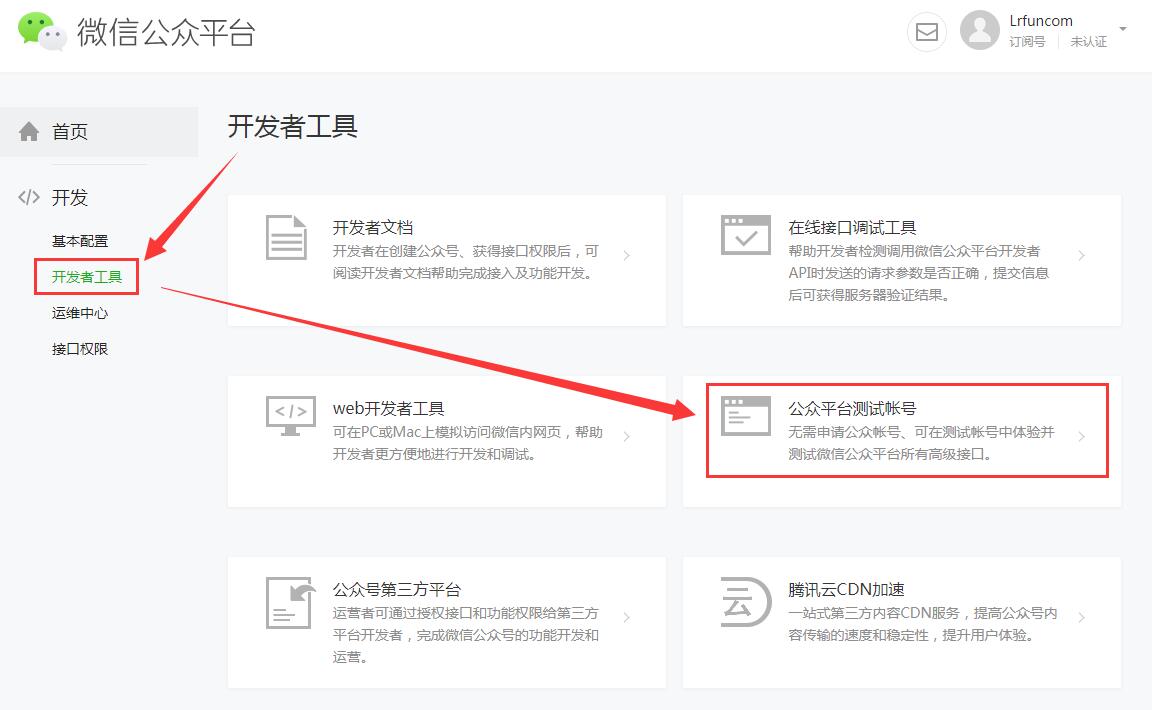
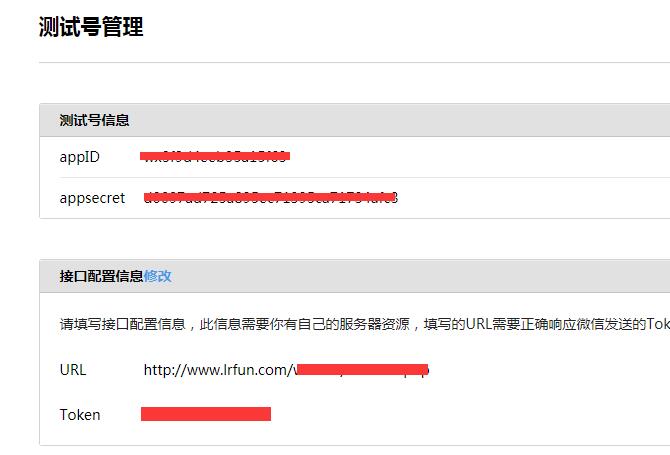
准备工作:登录微信公众平台,在基本配置下,查看appid和设置appsecret、回调URL、token,小编这里使用的是测试账号,因为正式的要审核(收费300个大洋),如下图:
小编是使用springMVC+mybatis开发的,为了方便展示,小编将代码都写在同一个controller下了,你们自己可以做下拆分,代码如下:
package com.lrfun.web.controller;

import java.io.InputStream;
import java.util.Date;
import java.util.HashMap;
import java.util.List;
import java.util.Map;

import javax.servlet.http.HttpServletRequest;

import org.apache.commons.httpclient.HttpClient;
import org.apache.commons.httpclient.methods.ByteArrayRequestEntity;
import org.apache.commons.httpclient.methods.GetMethod;
import org.apache.commons.httpclient.methods.PostMethod;
import org.apache.commons.httpclient.methods.RequestEntity;
import org.dom4j.Element;
import org.dom4j.io.SAXReader;
import org.springframework.stereotype.Controller;
import org.springframework.ui.ModelMap;
import org.springframework.web.bind.annotation.RequestMapping;
import org.springframework.web.bind.annotation.ResponseBody;
import org.springframework.web.servlet.ModelAndView;

import com.google.gson.Gson;

@Controller
public class WechatController {

    //Lrfun测试公众号
    private static final String app_id = "xxx";
    private static final String app_secret = "xxx";

    private static final Gson gson = new Gson();
    /***
     * httpClient-Get请求
     * @param url 请求地址
     * @return
     * @throws Exception
     */
    public static Map<String, Object> httpClientGet(String url) throws Exception {
        HttpClient client = new HttpClient();
        client.getParams().setContentCharset("UTF-8");
        GetMethod httpGet = new GetMethod(url);
        try {
            client.executeMethod(httpGet);
            String response = httpGet.getResponseBodyAsString();
            Map<String, Object> map = gson.fromJson(response, Map.class);
            return map;
        } catch (Exception e) {
            throw e;
        } finally {
            httpGet.releaseConnection();
        }
    }

    /***
     * httpClient-Post请求
     * @param url 请求地址
     * @param params post参数
     * @return
     * @throws Exception
     */
    public static Map<String, Object> httpClientPost(String url, String params) throws Exception {
        HttpClient client = new HttpClient();
        client.getParams().setContentCharset("UTF-8");
        PostMethod httpPost = new PostMethod(url);
        try {
            RequestEntity requestEntity = new ByteArrayRequestEntity(params.getBytes("utf-8"));
            httpPost.setRequestEntity(requestEntity);
            client.executeMethod(httpPost);
            String response = httpPost.getResponseBodyAsString();
            Map<String, Object> map = gson.fromJson(response, Map.class);
            return map;
        } catch (Exception e) {
            throw new RuntimeException(e);
        } finally {
            httpPost.releaseConnection();
        }
    }

    // 获取access_tocken
    private String getAccessToken() throws Exception{
        String url = "https://api.weixin.qq.com/cgi-bin/token?grant_type=client_credential&appid=" + app_id + "&secret=" + app_secret;
        Map<String, Object> accessTokenMap = WechatController.httpClientGet(url);
        System.out.println(accessTokenMap);
        return accessTokenMap.get("access_token").toString();
    }

    // 通过openid获取用户信息
    private Map<String, Object> getUserInfoByOpenid(String openid) throws Exception {
        String access_tocken = getAccessToken();
        String url = "https://api.weixin.qq.com/cgi-bin/user/info?access_token=" + access_tocken + "&openid=" + openid;
        Map<String, Object> map = httpClientGet(url);
        return map;
    }

    // 生成带参数的二维码,扫描关注微信公众号,自动登录网站
    @RequestMapping(value = "/wechat/mpLogin.html")
    public ModelAndView wechatMpLogin(ModelMap modelMap) throws Exception {
        String access_token = getAccessToken();
        String url = "https://api.weixin.qq.com/cgi-bin/qrcode/create?access_token=" + access_token;
        String scene_str = "lrfun.com." + new Date().getTime();
        String params = "{\"expire_seconds\":600, \"action_name\":\"QR_STR_SCENE\", \"action_info\":{\"scene\":{\"scene_str\":\"" + scene_str + "\"}}}";
        Map<String, Object> resultMap = httpClientPost(url, params);
        if (resultMap.get("ticket") != null) {
            String qrcodeUrl = "https://mp.weixin.qq.com/cgi-bin/showqrcode?ticket=" + resultMap.get("ticket");
            modelMap.put("qrcodeUrl", qrcodeUrl);
        }
        modelMap.put("scene_str", scene_str);
        return new ModelAndView("/test/wechatMpLogin.vm", modelMap);
    }

    // 检测登录
    @RequestMapping("/wechat/checkLogin.html")
    public @ResponseBody Map<String, Object> wechatMpCheckLogin(String scene_str){
        // 根据scene_str查询数据库,获取对应记录
        // SELECT * FROM wechat_user_info WHERE event_key='scene_str';
        Map<String, Object> returnMap = new HashMap<String, Object>();
        if (true) {
            returnMap.put("result", "true");
        } else {
            returnMap.put("result", "false");
        }
        return returnMap;
    }

    // 回调函数
    @RequestMapping(value = "/wechat/callback.html")
    public void callback(HttpServletRequest httpServletRequest) throws Exception {
        Map<String, String> callbackMap = xmlToMap(httpServletRequest); //获取回调信息
        //下面是返回的xml
        //<xml><ToUserName><![CDATA[gh_f6b4da984c87]]></ToUserName> //微信公众号的微信号
        //<FromUserName><![CDATA[oJxRO1Y2NgWJ9gMDyE3LwAYUNdAs]]></FromUserName> //openid用于获取用户信息,做登录使用
        //<CreateTime>1531130986</CreateTime> //回调时间
        //<MsgType><![CDATA[event]]></MsgType>
        //<Event><![CDATA[SCAN]]></Event>
        //<EventKey><![CDATA[lrfun.com.UxJkWC1531967386903]]></EventKey> //上面自定义的参数(scene_str)
        //<Ticket><![CDATA[gQF57zwAAAAAAAAAAS5odHRwOi8vd2VpeGluLnFxLmNvbS9xLzAyY2ljbjB3RGtkZWwxbExLY3hyMVMAAgTvM0NbAwSAOgkA]]></Ticket> //换取二维码的ticket
        //</xml>
        if (callbackMap != null && callbackMap.get("FromUserName").toString() != null) {
            // 通过openid获取用户信息
            Map<String, Object> wechatUserInfoMap = getUserInfoByOpenid(callbackMap.get("FromUserName"));
            // 将数据写入到数据库中,前面自定义的参数(scene_str)也需记录到数据库中,后面用于检测匹配登录
            // INSERT INTO wechat_user_info......(数据库操作)
        }
    }

    // xml转为map
    private Map<String, String> xmlToMap(HttpServletRequest httpServletRequest) {
        Map<String, String> map = new HashMap<String, String>();
        try {
            InputStream inputStream = httpServletRequest.getInputStream();
            SAXReader reader = new SAXReader(); // 读取输入流
            org.dom4j.Document document = reader.read(inputStream);
            Element root = document.getRootElement(); // 得到xml根元素
            List<Element> elementList = root.elements(); // 得到根元素的所有子节点
            // 遍历所有子节点
            for (Element e : elementList)
                map.put(e.getName(), e.getText());
            // 释放资源
            inputStream.close();
            inputStream = null;
            return map;
        } catch (Exception e) {
            e.getMessage();
        }
        return null;
    }
}
静态文件wechatMpLogin.vm:
<!DOCTYPE html>
<html>
<head>
<meta http-equiv="Content-Type" content="text/html; charset=UTF-8">
<title>微信扫码,关注并登录</title>
<link rel="shortcut icon" href="/favicon.ico" type="image/x-icon" />
<style>a{outline:0}h1,h2,h3,h4,h5,h6,p{margin:0;font-weight:400}a img,fieldset{border:0}body{font-family:"Microsoft Yahei";color:#fff;background:0 0}.impowerBox{display:inline-block;vertical-align:middle;line-height:1.6;position:relative;width:100%;z-index:1;text-align:center}.impowerBox .title{text-align:center;font-size:20px}.impowerBox .qrcode{width:280px;height:280px;margin-top:15px;border:1px solid #E2E2E2}.impowerBox .info{width:280px;margin:0 auto}.impowerBox .status{padding:7px 14px;text-align:left}.impowerBox .status.normal{margin-top:15px;background-color:#232323;border-radius:100px;-moz-border-radius:100px;-webkit-border-radius:100px;box-shadow:inset 0 5px 10px -5px #191919,0 1px 0 0 #444;-moz-box-shadow:inset 0 5px 10px -5px #191919,0 1px 0 0 #444;-webkit-box-shadow:inset 0 5px 10px -5px #191919,0 1px 0 0 #444}.impowerBox .status.status_browser{text-align:center}.impowerBox .status p{font-size:13px}</style>
<script type="text/javascript" src="http://www.lrfun.com/statics/fun2/js/jquery.min.js"></script>
</head>
<body style="background-color: rgb(51, 51, 51); padding: 50px;">
<div class="main impowerBox">
    <div class="loginPanel normalPanel">
        <div class="title">微信登录</div>
        <div class="waiting panelContent">
            <div class="wrp_code">
                <img class="qrcode lightBorder" src="$!{qrcodeUrl}"/>
            </div>
            <div class="info">
                <div class="status status_browser js_status normal" id="wx_default_tip">
                    <p>请使用微信扫描二维码登录</p>
                    <p>“lrfun.com”</p>
                </div>
            </div>
        </div>
    </div>
</div>
<script type="text/javascript">
    $(document).ready(function () {
        setInterval("wechatCheckLogin()", 2000);
    });

    function wechatCheckLogin(){
        $.post("/wechat/checkLogin.html", {scene_str:"$!{scene_str}"}, function(data){
            if(data.result == "true"){
                alert("成功,登录跳转!");
            } else {
                alert("失败!");
            }
        }, "JSON");
    }
</script>
</body>
</html>
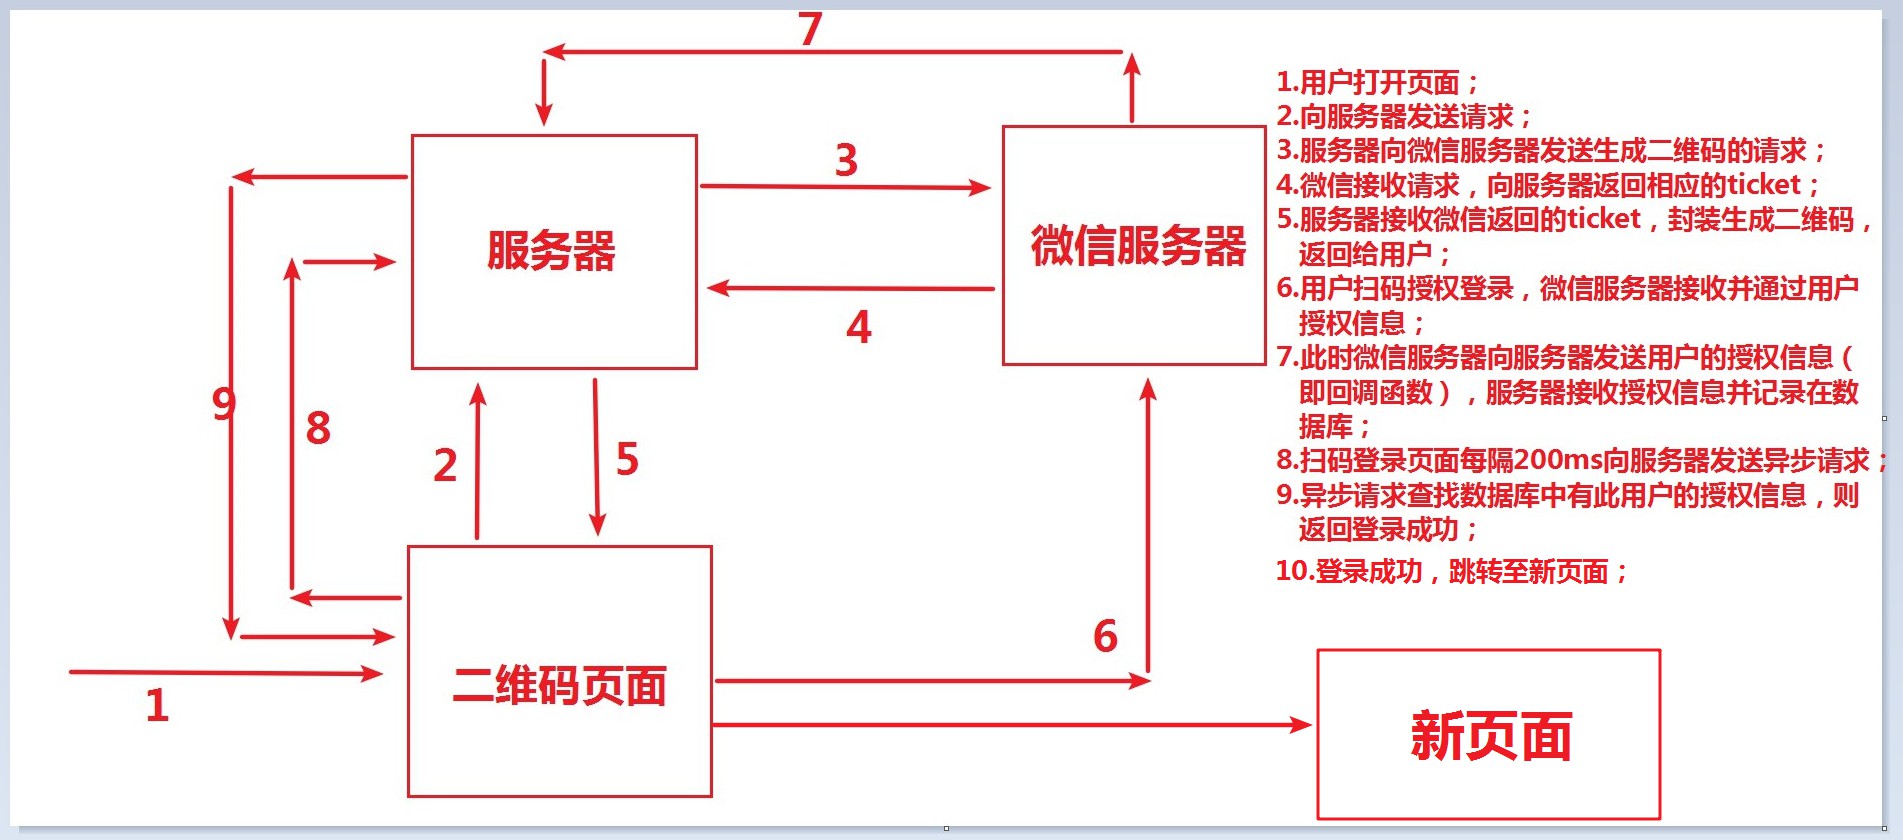
附流程图:
上一篇:Java Mybatis generator 逆向工程去掉表前缀
下一篇:Java 根据URL,将网页转存为PDF文件